
📌 Intro
Jetson Xavier를 이용하여 Yolov5를 실행하는데, 이 때 GPU를 사용하지 못하는 것을 확인하였다. 여러가지 방법으로 해결을 해보려다가 JetPack부터 재설치를 진행하는 것이 빠를 것 같아 처음부터 진행하려고 한다.
📌 Xavier 리커버리모드 진입
- Xavier를 Shutdown해서 불이 꺼진 것을 확인한다.
- 본체 뒤면에 있는 중앙 버튼(Recovery)를 누르고 있는 상태에서 전원버튼을 동시에 누른 뒤 불이 들어온 것을 확인하고 두 버튼을 동시게 뗀다
- Xavier와 컴퓨터를 USB to C 로 연결한다.
📌 SDK Manager 실행
- 우분투가 깔려있는 컴퓨터에서 아래 링크를 따라 들어간 뒤 SDK Manager를 설치한다.
https://developer.nvidia.com/embedded/jetpack#collapseAllJetson
참고로 NVIDIA에 계정이 있어야 하니 꼭 회원가입을 해주도록 하자.
아래는 jetpack설치를 어떻게 진행했는지 스크린샷을 통해 남겨두었다. window에서 남긴 스크린 샷이지만 실제로는 우분투에서 진행했다.
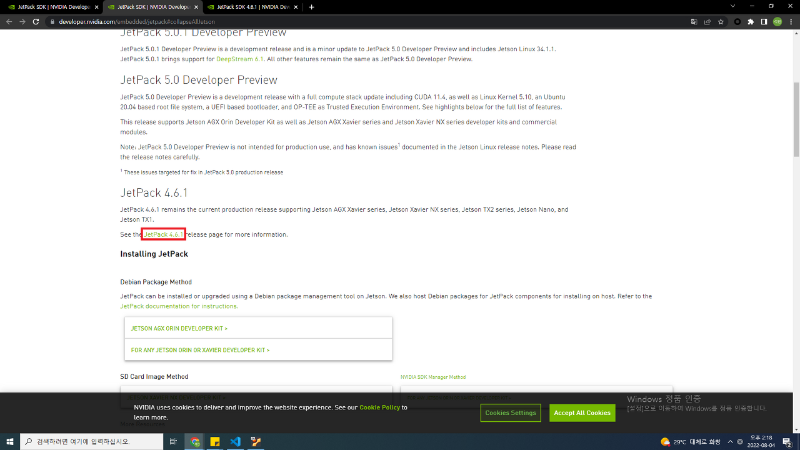
JetPack 4.6.1을 클릭한다.
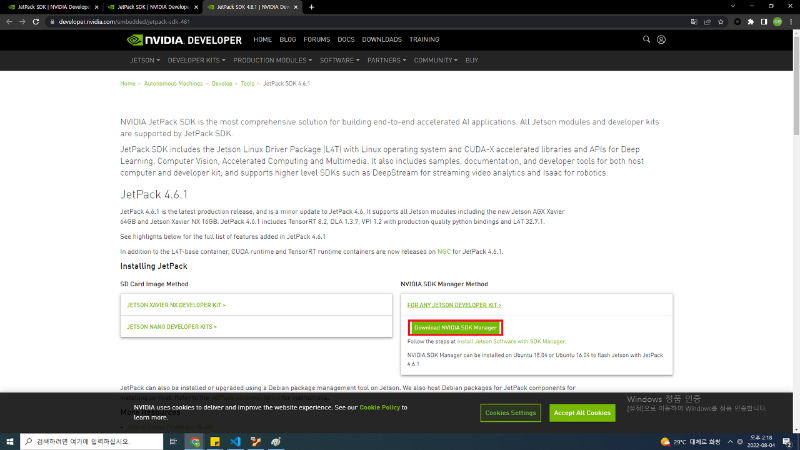
FOR ANY JETSON DEVELOPER KIT -> Download NVIDIA SDK Manager를 클릭하여 다운받는다.

1. 나처럼 다운로드를 받았다면 다운 받은 파일을 실행시키자. 나의 경우에는 시간이 좀 걸렸다.
실행 시킨 뒤 sdkmanager를 설치해주도록 하자.

2. 설치가 완료되고 sdk를 검색하면 SDKManager가 나온다. 실행시키자.

위에서 Xavier 리커버리 모드 진입을 문제없이 잘 진행했다면 아래와 같이 연결된 Xavier를 SDK Manager가 바로 인식한다. 만약 인식이 안된다면 Xavier 리커버리 모드 진입을 다시 진행해보거나 아래 기술한 버추얼 박스 usb 설정을 따르자.


TARGET OPERATING SYSTEM 에서 원하는 JetPack 버전을 설정하고 CONTINUE 버튼을 클릭하자. (나는 가장 최신 버전인 5.0버전을 선택하였다.)

왼쪽 하단에 accept는 체크해주고, Download now install later는 체크하지 말고 CONTINUE 버튼을 클릭하자.
(이 때 저장공간이 10기가 정도 필요하다고 하는 것 같다. 내가 만들었던 Virtual Box의 우분투는 그만큼의 저장공간을 할당하지 않았어서 여유롭게 100기가의 고정크기를 할당하여 우분투를 새로 만들어 진행했다.)

30%정도 진행하면 위와 같은 화면이 나온다. IP는 나중에 Xavier에서 확인한 뒤에 적어줄 것이니 잠시 대기하고 Username과 Password를 입력하자. 나는 JetPack을 처음 설치하는게 아니라 조금 다를 수 있다.
큰 차이는 없으니 완료한 뒤 Flash버튼클 클릭하면...!!! 오류가 난다...?
🚀 Error
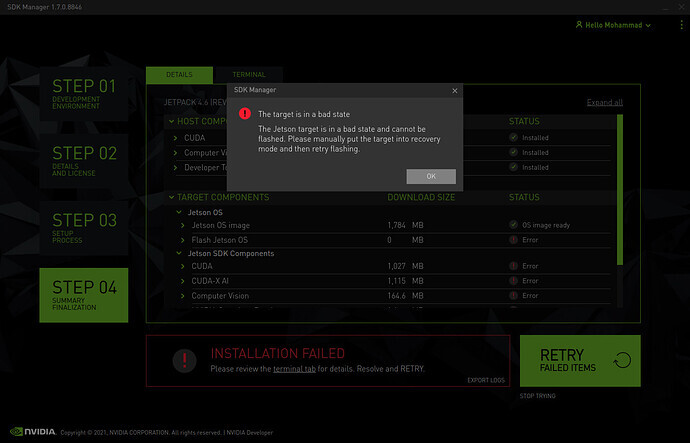
위와 같은 오류가 발생하며 진행이 되지 않는다. 구글링 결과 버추얼박스에서 JetPack설치는 안된다는 이야기가 많았다. 정확한 이유는 모르지만 나도 버추얼박스에서 실행하였기 때문에 이후로는 진행되지 않았다....
고민 끝에 연구실 컴퓨터에 우분투를 설치하고 JetPack을 설치할 예정이다. 그건 다음글로..하.......ㅠㅠ
📌 버추얼 박스 USB 설정
SDK Manager를 실행했을 때 Xavier가 바로 잡히지 않는 경우 버추얼박스에서 usb를 인식하지 못하는 이유 때문일 수 있다.
우선 우분투를 종료한 뒤 버추얼박스로 켜자.
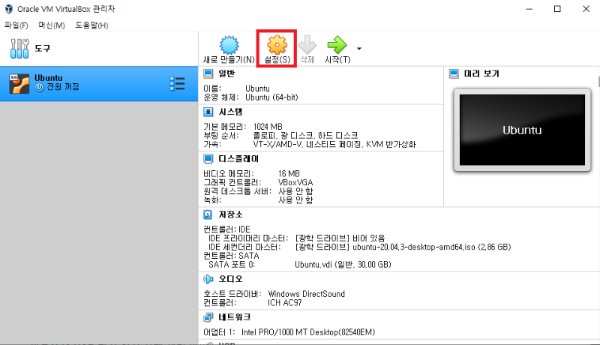
설치한 우분투를 클릭하고 [설정]으로 들어가자.

[USB] -> [USB 플러스 버튼] -> [NVIDIA Corp. APX[0102]] 를 선택하여 버추얼 박스에서 usb를 인식할 수 있도록 해준다. 그리고 다시 버추얼 박스를 실행하고 SDK Manager를 실행하면 잘 인식한다.